Automating Blog Deployment with Hugo, GitHub Actions, and MinIO
As I mentioned in an older post, I migrated from Ghost to Hugo because this blog is nothing more than just static pages, so the overhead of managing and keeping it up-to-date was wasn’t worth it for me.
So far, the 2 posts I wrote since this migration were uploaded to my webserver manually. I made the Markdown file, I run hugo, scped the public folder and boom, the new post was live. But I knew I could do better than this.
First of all, I needed to remember all the commands and steps to actually bring my post live. I know that they are 2 commands, but
- I didn’t document them anywhere
- With the frequency I post on this blog, they were also gone from the history of my shell, or maybe I used my laptop instead of my desktop to upload them so the commands weren’t in the shell history to begin with
So, can I be 100% percent sure that to render my posts correctly I just need to run hugo or am I forgetting a flag? Am I using the correct path to scp these files to the remote server or I will have to manually move them around because I forgot to place them in the html directory?
Instead of having a simple note in my personal docs (I use Obsidian btw), I decided to document all these steps in code. And yes, I could have a simple shell script at the root my blog repo that is called deploy.sh, and when it’s executed it will take care of everything for me.
But is this enough in 2024, where Github Actions, Gitlab CI/CD, Woodpecker CI or Argo Workflows exist? I guess not. As this blog is hosted on Github, I decided to automate the deployment of new blog posts using Github Actions.
Once again, I didn’t go with Github Pages although I’m still considering it (but I want to experiment with different solutions first 😄). I wanted to use an S3 or S3-compatible bucket and backend. I could go with Backblaze and B2, which I already use for my daily backups but I am reluctant to host public content as the API calls are getting charged. I’m pretty certain that the amount of traffic this blog has will probably cost me 1€ in the span of 5 years (or even more). However, I’ve read countless stories of people misconfiguring permissions or becoming targets of DDoS attacks, only to see their bills skyrocket unexpectedly. I’d rather explore a more predictable option, and given that I already host a MinIO server at home I said why not give this a try to see how it goes!
Setting up a MinIO bucket⌗
This setup should look pretty similar to each S3-compatible service. Firstly, I need to create a bucket where it all the static content will be hosted. I navigate to the MinIO control panel and in the Administrator panel I add the bucket. I decided to call my bucket blog-spanagiot-gr as this will make the contents pretty obvious for my future self.
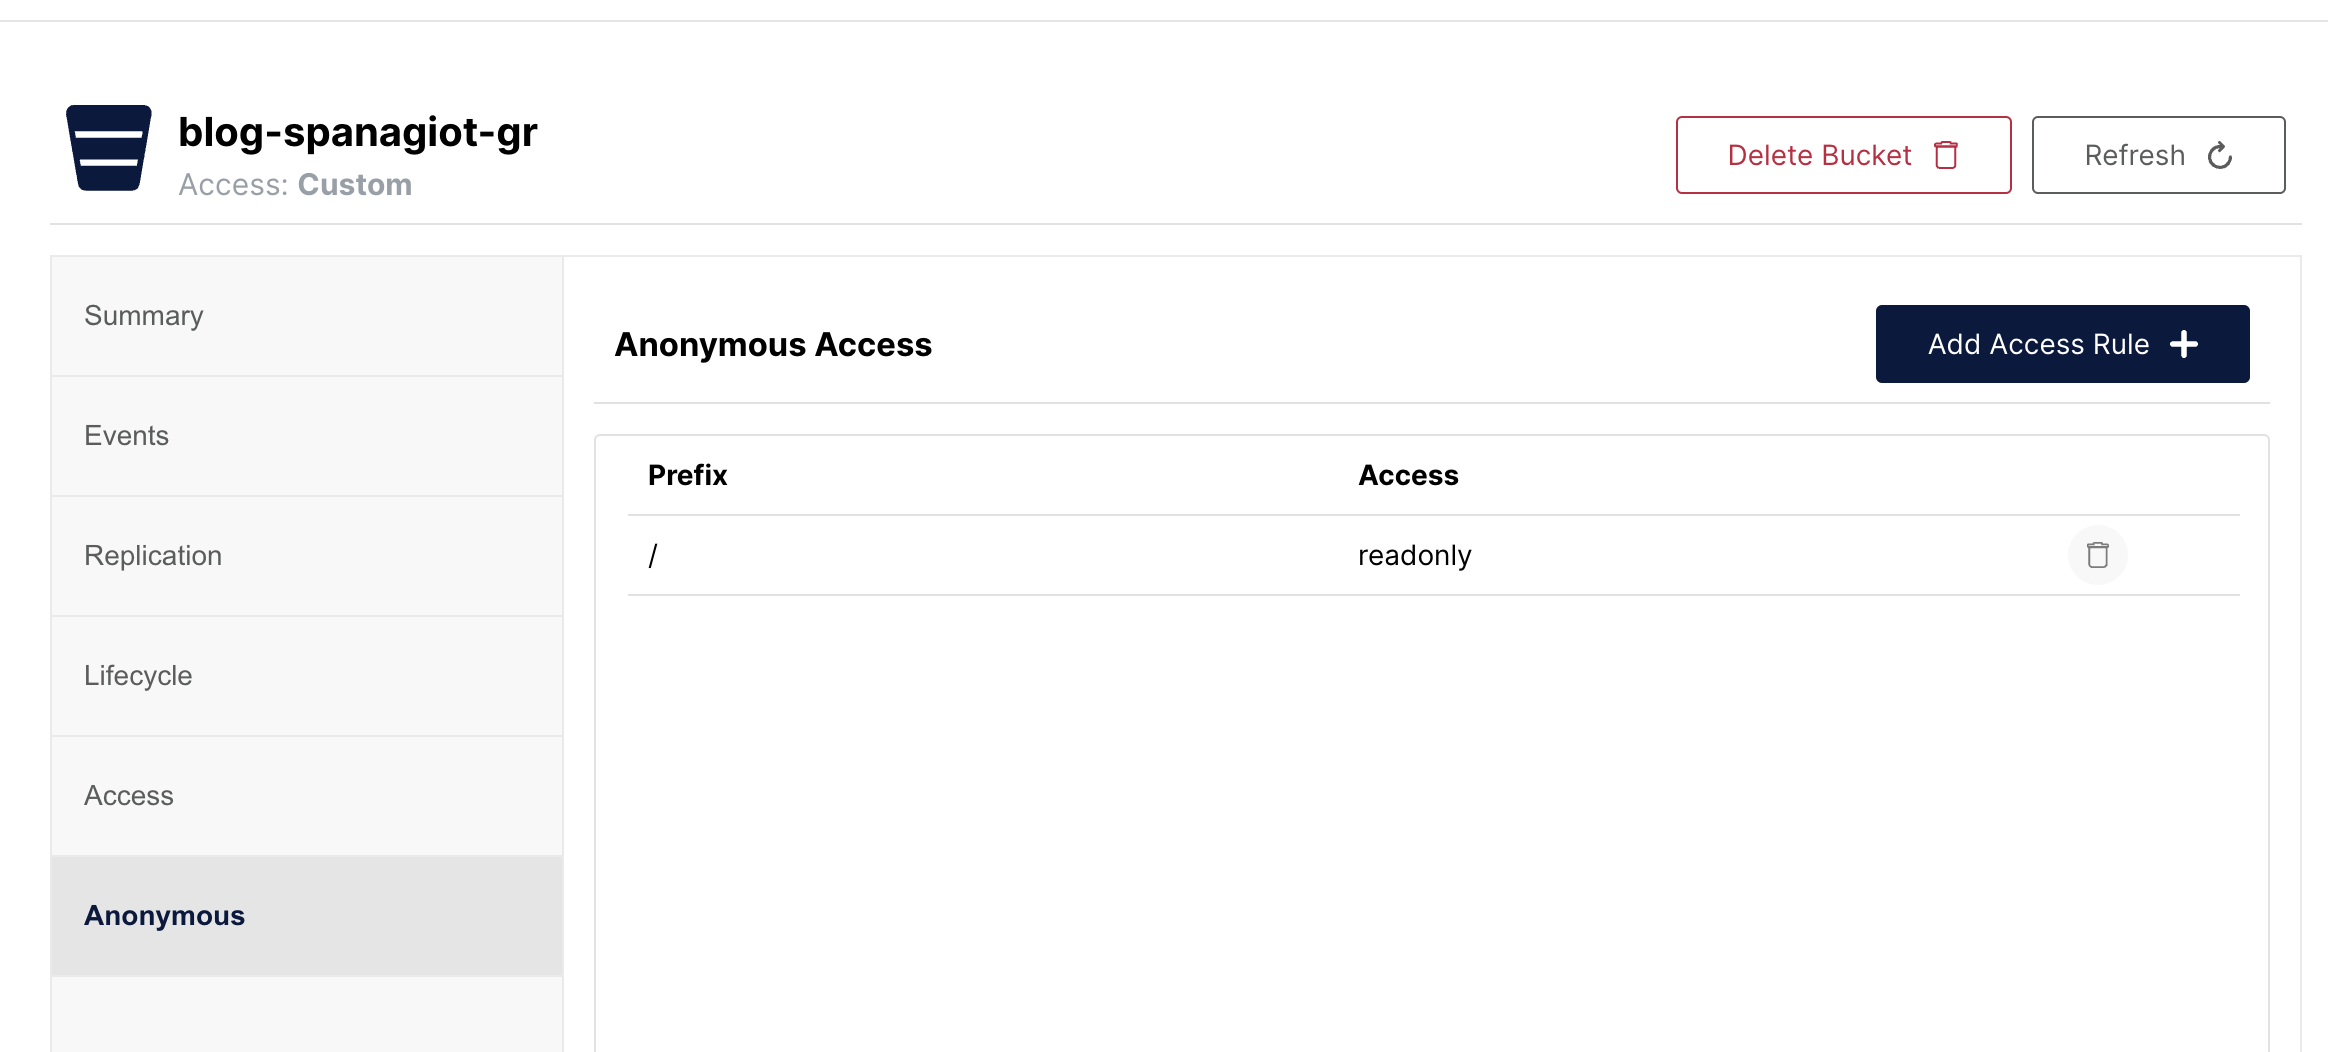
Now, we need to add permissions to this bucket. Anonymous users should be able to read all the contents but they shouldn’t be able to write and they user used for the deployment should be able to read and write inside this bucket.
In MinIO providing access to anonymous users is easy. Inside the bucket options, there is an Anonymous panel. There, you can set readonly access to prefix / (meaning the whole bucket).
For the deployment user, we will need to add a Policy first. This policy should look like this.
{
    "Version": "2012-10-17",
    "Statement": [
        {
            "Effect": "Allow",
            "Action": [
                "s3:DeleteObject",
                "s3:GetObject",
                "s3:ListBucket",
                "s3:PutObject"
            ],
            "Resource": [
                "arn:aws:s3:::blog-spanagiot-gr",
                "arn:aws:s3:::blog-spanagiot-gr/*"
            ]
        }
    ]
}
This means that the user that has this policy attached is able to Read, List (meaning see the objects in the bucket), Write and Delete objects under the /* prefix (the whole bucket).
What I need to do next is to create a user with this policy attached. The name and the password of this user will be used by our action to upload the static assets to our bucket.
Setting up the workflow⌗
As this isn’t a tutorial about Github Actions, I’ll explain in high level what this workflow does. Keep in mind that I glued together actions from the Github Actions marketplace and this was my first attempt writing a workflow for GHA. Writing a basic workflow from scratch was pretty straightforward and my experience was positive.
After setting the name, the triggers and the permissions, I split the workflow to two jobs. One job called build, responsible for generating the static files of this blog and, another job called deploy, responsible for uploading these files to the place that they will be served from, in our case, MinIO.
The complete workflow file is here.
Build step⌗
  build:
    runs-on: ubuntu-latest
    env:
      HUGO_VERSION: 0.128.0
    steps:
      - name: Install Hugo CLI
        run: |
          wget -O ${{ runner.temp }}/hugo.deb https://github.com/gohugoio/hugo/releases/download/v${HUGO_VERSION}/hugo_extended_${HUGO_VERSION}_linux-amd64.deb \
          && sudo dpkg -i ${{ runner.temp }}/hugo.deb

      - name: Install Dart Sass
        run: sudo snap install dart-sass

      - name: Checkout
        uses: actions/checkout@v4
        with:
          submodules: recursive

      - name: Build with Hugo
        env:
          HUGO_CACHEDIR: ${{ runner.temp }}/hugo_cache
          HUGO_ENVIRONMENT: production
        run: |
          hugo \
            --minify

      - name: Upload public dir
        uses: actions/upload-artifact@v4
        with:
          name: public
          path: public
The build step gathers and installs all dependencies for running hugo and generating the static assets. The content is generated in the directory called public. Finally, it uploads this directory to the artifacts of this workflow, so they can be accessed from the other steps, in our case the deploy step.
Deploy step⌗
  deploy:
    runs-on: ubuntu-latest
    needs: build
    steps:
      - name: Download public dir
        uses: actions/download-artifact@v4
        with:
          name: public
          path: public

      - name: Minio Deploy
        uses: hkdobrev/minio-deploy-action@v1
        with:
          endpoint: ${{ secrets.MINIO_ENDPOINT }}
          access_key: ${{ secrets.ACCESS_KEY }}
          secret_key: ${{ secrets.SECRET_KEY }}
          bucket: 'blog-spanagiot-gr'
          # Optional inputs with their defaults:
          source_dir: 'public'
          target_dir: '/public'
This job consists of 2 simple steps. First, download the artifacts from the previous job and then upload them to MinIO, using the credentials of a user that has write permissions to this bucket.
Configuring Caddy⌗
Now that we have both the blog static assets to store and the place to store them, let’s see how this can be served to the rest of the world. This is how you are reading this post!
I use Caddy as my webserver for many years now. It was one of the first (at least when I searched for a webserver) that automatically obtained and renewed TLS certificates for the domains you use in the configuration. This and its simple configuration language made me use it hassle-free for all this time.
I open my Caddyfile and I add the following configuration for accessing my MinIO instance under the blog.spanagiot.gr domain.
blog.spanagiot.gr {
        reverse_proxy https://myminio.local {
          header_up Host "myminio.local"
          rewrite /blog-spanagiot-gr/public{uri}
        }
        handle_path /tag/* {
                redir /* /tags/{uri}
        }
        import logging
        import common
}
When someone accesses the blog.spanagiot.gr the request is proxied to another webserver of mine that proxies the request to the MinIO backend. For this second webserver to correctly proxy the request to MinIO, we need to rewrite the Host header. Also, because the blog content is located in the blog-spanagiot-gr bucket under the public prefix, we are rewriting a part of the URI path, appending /blog-spanagiot-gr/public to it. The /tag/* part is from my Ghost to Hugo transfer.
I open a browser, type blog.spanagiot.gr and press enter. But nothing. Instead of seeing the home page of my blog, I saw a very nice 404 Not found error. What happened?
When you navigate to a page and you don’t specify a specific resource or page (for example https://blog.spanagiot.gr/) the webserver serves you a default page, usually index.html or index.php. More information from Wikipedia here. MinIO doesn’t do this because it’s not a webserver. So it sees a request for an object called / and this object doesn’t exist in my bucket, thus the 404 error.
To bypass this issue, we need to instruct Caddy to append the index.html suffix to all URI paths that end to /.
blog.spanagiot.gr {
        reverse_proxy https://myminio.local {
          header_up Host "myminio.local"
          rewrite /blog-spanagiot-gr/public{uri}
        }
        handle_path /tag/* {
                redir /* /tags/{uri}
        }
        @slash_ending path_regexp ^/(.*/)?$
        rewrite @slash_ending {uri}index.html
        import logging
        import common
}
We create a matcher with @slash_ending path_regexp ^/(.*/)?$. This matches the blog.spanagiot.gr/ request and all the requests that start with / have any characters in the middle and end with /. All requests that are matched under this matcher, are getting the index.html suffix.
I save the file, reload Caddy once more and voilà. My blog is served from the MinIO server running in my home.